Installation
Execute following commands:
git clone https://github.com/comfyanonymous/ComfyUI.git
cd custom_nodes
git clone https://github.com/ltdrdata/ComfyUI-Manager.git
Hotkeys
- Hold <ALT> while dragging a node to create a copy
- Use <Shift>+<Ctrl>+V to copy a node with it’s connections
- <Ctrl>+<click> to select multiple nodes
- <Shift>+<drag> to move multiple selected nodes
Extra model path
To prevent all models from being store twice if you are using both Automatic1111 and ComfyUI, you can edit the file extra_model_paths.yaml in the ComfyUI directory. Typically the only variable you need to set is base_path as shown below:
base_path: C:\AUTOMATIC1111\stable-diffusion-webui
Custom nodes
These are some “quality of life” custom nodes you should install.
| bmad4ever | ComfyUI-Bmad-DirtyUndoRedo |
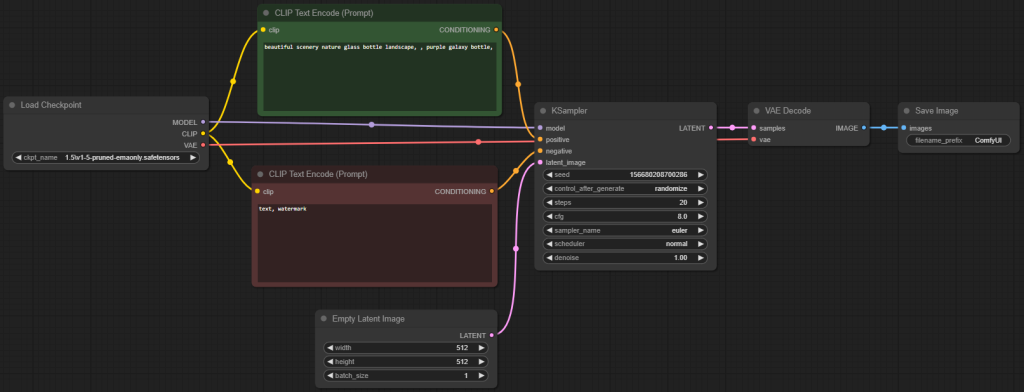
Default flow
This is the minimal set of nodes you need to generate (and view / preview / save) an image:
- Model (Load checkpoint)
- Prompt (CLIP text encode)
- Negative prompt (CLIP text encode)
- Latent image (check best resolutions for SD 1.5, 2.1 and XL)
- KSampler
- VAE Decoder
- Save (or preview) image node
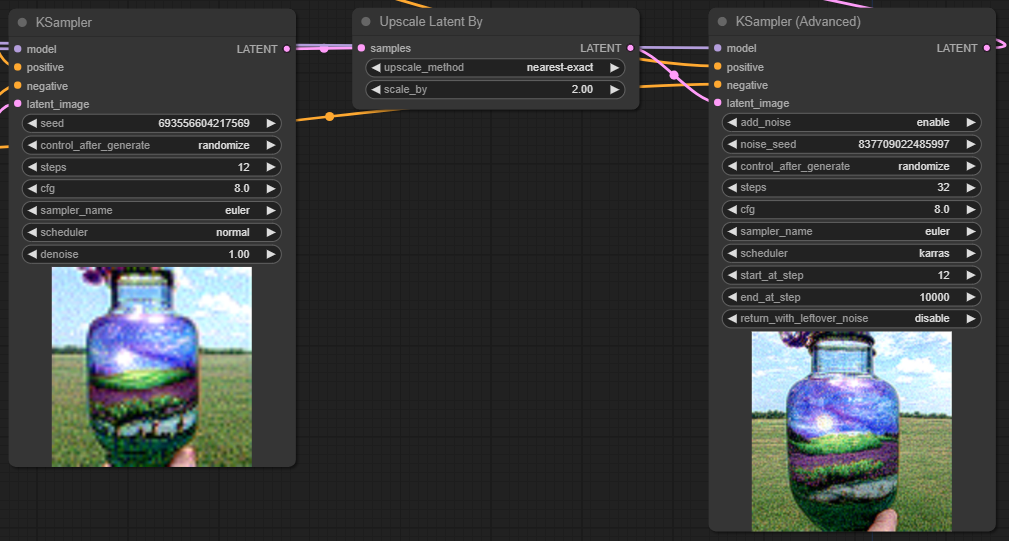
Upscaling / refinement
You can do a (latent) output image upscale by using following nodes:
- Upscale latent (by)
- Adding another KSampler
Note that in this example I also made use of the KSampler Advanced functionality by having the first sampler run 12 steps (normal scheduler) and then doing another 20 steps using the faster Karras after the latent upscale. This is indeed accomplished by using the start_at_step and the steps value.